-

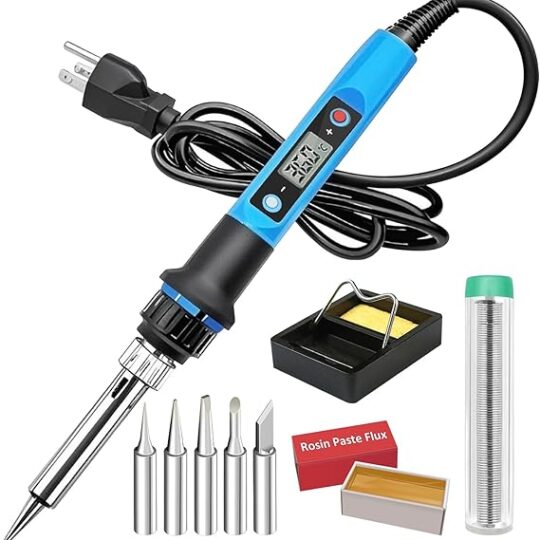
The station is user-configurable through its digital interface. Here’s how to set it up:
-
Connection: Connect the soldering iron to its port on the control unit. Plug the station’s power cord (220V, EU plug) into a wall outlet.
-
Power On: Turn on the station using the power switch. The LCD screen will illuminate.
-
Set Temperature:
-
Use the ▲ (Up) and ▼ (Down) buttons to adjust the temperature to your desired value (e.g., 320°C for lead-free solder, 280°C for lead-based solder on PCBs).
-
The screen will show the set temperature (usually the larger number) and often the actual tip temperature (a smaller number) as it heats up.
-
-
Waiting to Heat: Wait for the actual temperature to stabilize at the set value. The station may beep or show an indicator when ready.
-
Calibration (if needed): Some stations allow temperature calibration. Refer to the manual. This usually involves entering a settings menu (e.g., by holding buttons) and applying an offset to match the displayed temperature to a known value using a thermometer.
-
Using the Stand: Always place the iron in its stand when not in use. Keep the sponge in the tray damp for cleaning the tip.
-
Tip Maintenance: Regularly clean the tip on the damp sponge and apply fresh solder to “tin” it, protecting it from oxidation.
Quick View
Wishlist
Compare
Add to cartThe station is user-configurable through its digital interface. Here’s how to set it up:
-
Connection: Connect the soldering iron to its port on the control unit. Plug the station’s power cord (220V, EU plug) into a wall outlet.
-
Power On: Turn on the station using the power switch. The LCD screen will illuminate.
-
Set Temperature:
-
Use the ▲ (Up) and ▼ (Down) buttons to adjust the temperature to your desired value (e.g., 320°C for lead-free solder, 280°C for lead-based solder on PCBs).
-
The screen will show the set temperature (usually the larger number) and often the actual tip temperature (a smaller number) as it heats up.
-
-
Waiting to Heat: Wait for the actual temperature to stabilize at the set value. The station may beep or show an indicator when ready.
-
Calibration (if needed): Some stations allow temperature calibration. Refer to the manual. This usually involves entering a settings menu (e.g., by holding buttons) and applying an offset to match the displayed temperature to a known value using a thermometer.
-
Using the Stand: Always place the iron in its stand when not in use. Keep the sponge in the tray damp for cleaning the tip.
-
Tip Maintenance: Regularly clean the tip on the damp sponge and apply fresh solder to “tin” it, protecting it from oxidation.
-
-
Uv559 Mechanic Soldering Flux Paste Uv559 No Clean Bga Solder Ball Repair Welding Paste For Phone Pcb Pga Smd Rework
Rated 3.50 out of 5-
Brand: Mechanic
-
Model: UV559
-
Type: No-Clean Flux Paste
-
Applications: BGA, SMD, PGA, PCB, Mobile Repair, Laptop Repair
-
Features: Oxidation prevention, strong adhesion, smooth solder flow
-
Packaging: Compact container for easy use
1 day delivery -
-
Sale!

-
Brand/Model: TNI-U 093D+
-
Power: 60W
-
Temperature Control: Variable (adjustable heat)
-
Heating Element: Durable, long-life
-
Handle: Anti-slip, heat-resistant ergonomic grip
-
Applications: PCB soldering, electronics repair, DIY, hobby work
-
Heating Speed: Fast heating with stable output
-
Safety: Overheating protection design
5 day deliveryQuick View
Wishlist
Compare
Variable Tni-u 60w Soldering Iron 093d+
$219 – $249Price range: $219 through $249Sold: 0Available: 6-
Brand/Model: TNI-U 093D+
-
Power: 60W
-
Temperature Control: Variable (adjustable heat)
-
Heating Element: Durable, long-life
-
Handle: Anti-slip, heat-resistant ergonomic grip
-
Applications: PCB soldering, electronics repair, DIY, hobby work
-
Heating Speed: Fast heating with stable output
-
Safety: Overheating protection design
5 day delivery -
-

-
Model: SE-930
-
Brand: Volder
-
Power: 30W
-
Voltage: 220–240V AC
-
Temperature Range: 100°C – 400°C
-
Tip Type: Replaceable, lead-free
-
Heating Element: Nickel-chromium
-
Indicator: Power-on light
-
Safety: CE & RoHS certified
-
Uses: Suitable for repair, assembly, and small electronics projects
-
Price Range in Pakistan: Around PKR 580 to 800
Quick View
Wishlist
Compare
Add to cart-
Model: SE-930
-
Brand: Volder
-
Power: 30W
-
Voltage: 220–240V AC
-
Temperature Range: 100°C – 400°C
-
Tip Type: Replaceable, lead-free
-
Heating Element: Nickel-chromium
-
Indicator: Power-on light
-
Safety: CE & RoHS certified
-
Uses: Suitable for repair, assembly, and small electronics projects
-
Price Range in Pakistan: Around PKR 580 to 800
-
-

-
Model: WEP 1502DD
-
Output Voltage: 0 – 15V DC (adjustable)
-
Output Current: 0 – 2A (max)
-
Display: Digital (LED)
-
Input Voltage: 220V AC (standard in Pakistan)
-
Type: Regulated bench power supply
-
Applications: Electronics repair, mobile repair, lab testing, DIY projects
Quick View
Wishlist
Compare
Add to cart-
Model: WEP 1502DD
-
Output Voltage: 0 – 15V DC (adjustable)
-
Output Current: 0 – 2A (max)
-
Display: Digital (LED)
-
Input Voltage: 220V AC (standard in Pakistan)
-
Type: Regulated bench power supply
-
Applications: Electronics repair, mobile repair, lab testing, DIY projects
-
-

Product Configuration
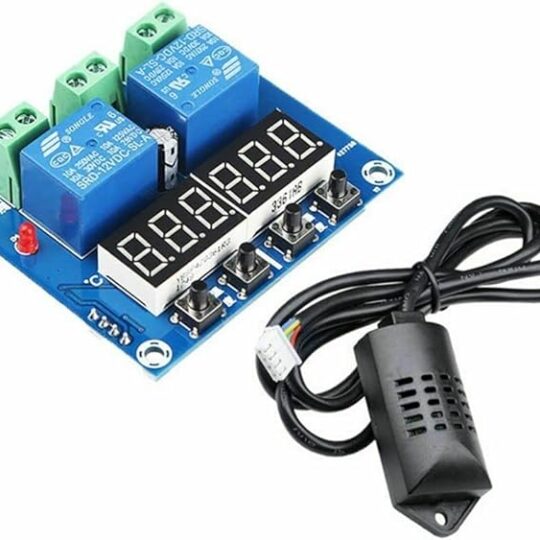
Power Connection: Wire 12V DC power to the V+ and V- terminals.Sensor Connection: Plug in the temp/humidity sensor to the dedicated port.
Load Wiring:
Connect heater/cooler to the temp control relay terminals.
Connect humidifier/dehumidifier to the humidity control relay terminals.
Settings:
Use buttons to set temp/humidity limits and hysteresis (activation differential).
Enable alarms if needed.
Calibration: Adjust sensor offsets in settings for accuracy.
Quick View
Wishlist
Compare
Add to cartProduct Configuration
Power Connection: Wire 12V DC power to the V+ and V- terminals.Sensor Connection: Plug in the temp/humidity sensor to the dedicated port.
Load Wiring:
Connect heater/cooler to the temp control relay terminals.
Connect humidifier/dehumidifier to the humidity control relay terminals.
Settings:
Use buttons to set temp/humidity limits and hysteresis (activation differential).
Enable alarms if needed.
Calibration: Adjust sensor offsets in settings for accuracy.
-

Product Configuration
-
Software Installation: Install the dedicated XP8710 software on a Windows PC from the provided CD or website.
-
Connection: Connect the programmer to the PC using a USB cable. Ensure it is recognized by the software.
-
Power On: Switch on the programmer. The internal systems will initialize.
-
Chip Selection: In the software, select the target chip by entering its full part number (e.g., W25Q128JV).
-
Socket Adapter: Choose the correct socket adapter (e.g., DIP8, SOP8) that matches your chip’s package and pin count.
-
Chip Insertion:
-
Orientation is Critical. Align the chip’s notch or dot (marking Pin 1) with the notch or dot on the programmer’s socket.
-
Gently lock the chip into place.
-
-
Basic Operations:
-
Read: First, always READ the chip’s content and SAVE a backup file.
-
Load: Open the new firmware (.bin, .hex file) you want to write.
-
Program: Execute the program command. The software will often Erase, Program, and Verify automatically.
-
-
Standalone Mode: Load files onto a USB drive, plug it into the programmer, and use the touchscreen to select and run operations without a PC.
Quick View
Wishlist
Compare
Add to cartProduct Configuration
-
Software Installation: Install the dedicated XP8710 software on a Windows PC from the provided CD or website.
-
Connection: Connect the programmer to the PC using a USB cable. Ensure it is recognized by the software.
-
Power On: Switch on the programmer. The internal systems will initialize.
-
Chip Selection: In the software, select the target chip by entering its full part number (e.g., W25Q128JV).
-
Socket Adapter: Choose the correct socket adapter (e.g., DIP8, SOP8) that matches your chip’s package and pin count.
-
Chip Insertion:
-
Orientation is Critical. Align the chip’s notch or dot (marking Pin 1) with the notch or dot on the programmer’s socket.
-
Gently lock the chip into place.
-
-
Basic Operations:
-
Read: First, always READ the chip’s content and SAVE a backup file.
-
Load: Open the new firmware (.bin, .hex file) you want to write.
-
Program: Execute the program command. The software will often Erase, Program, and Verify automatically.
-
-
Standalone Mode: Load files onto a USB drive, plug it into the programmer, and use the touchscreen to select and run operations without a PC.
-
-
-
Brand: XT-MAX
-
Model: DT830L
-
Type: Digital Multimeter
-
Functions: DC/AC Voltage, DC Current, Resistance, Continuity, Diode & Transistor Test
-
Display: LCD with backlight
-
Status: Sold Out
-


