-

- Power Connection: Apply 5V-15V DC to the VCC (+)* and GND (-) pins.
-
Output Signal: Connect the OUT pin to your target device (e.g., motor driver, microcontroller).
-
Adjust Frequency: Rotate the frequency pot to set the desired pulse rate (e.g., slow for fading effects, fast for motor control).
-
Adjust Duty Cycle: Rotate the duty cycle pot to change the pulse width (e.g., 50% for equal high/low time, 90% for mostly high).
-
Testing: Use an oscilloscope or multimeter to verify output characteristics.
Quick View
Wishlist
Compare
Add to cart- Power Connection: Apply 5V-15V DC to the VCC (+)* and GND (-) pins.
-
Output Signal: Connect the OUT pin to your target device (e.g., motor driver, microcontroller).
-
Adjust Frequency: Rotate the frequency pot to set the desired pulse rate (e.g., slow for fading effects, fast for motor control).
-
Adjust Duty Cycle: Rotate the duty cycle pot to change the pulse width (e.g., 50% for equal high/low time, 90% for mostly high).
-
Testing: Use an oscilloscope or multimeter to verify output characteristics.
-

-
Model: Hantek 2C42
-
Channels: 2
-
Bandwidth: 40 MHz
-
Sample Rate: 250 MSa/s (1CH), 125 MSa/s (2CH)
-
Display: 2.8″ color LCD
-
Record Length: 6K (single), 3K (dual)
-
VOLTS/DIV Range: 10 mV – 10 V/div
-
Input Impedance: 1 MΩ, 25 pF
-
Max Input Voltage: 150 VRMS
-
Multimeter Functions: Voltage, current, resistance, capacitance, diode, continuity
-
Battery: 18650 rechargeable lithium
-
Charging: USB-C, approx. 2 hrs full charge
-
Protections: Auto power-off, self-calibration
-
Portability: Handheld, lightweight
Quick View
Wishlist
Compare
Add to cart-
Model: Hantek 2C42
-
Channels: 2
-
Bandwidth: 40 MHz
-
Sample Rate: 250 MSa/s (1CH), 125 MSa/s (2CH)
-
Display: 2.8″ color LCD
-
Record Length: 6K (single), 3K (dual)
-
VOLTS/DIV Range: 10 mV – 10 V/div
-
Input Impedance: 1 MΩ, 25 pF
-
Max Input Voltage: 150 VRMS
-
Multimeter Functions: Voltage, current, resistance, capacitance, diode, continuity
-
Battery: 18650 rechargeable lithium
-
Charging: USB-C, approx. 2 hrs full charge
-
Protections: Auto power-off, self-calibration
-
Portability: Handheld, lightweight
-
-

-
Model: XH-M452
-
Function: Temperature + Humidity Control
-
Display: Digital LCD
-
Power Supply: DC 12V
-
Application: Incubators, Greenhouses, Aquariums, Mushroom farms
-
Build: High-quality, durable, compact
1 day deliveryQuick View
Wishlist
Compare
Sold: 0Available: 1-
Model: XH-M452
-
Function: Temperature + Humidity Control
-
Display: Digital LCD
-
Power Supply: DC 12V
-
Application: Incubators, Greenhouses, Aquariums, Mushroom farms
-
Build: High-quality, durable, compact
1 day delivery -
-
-
Model: PH-41C
-
Power: 300W
-
Input Voltage: 220V – 240V AC
-
Function: Dip soldering / tin melting
-
Temperature Control: Adjustable thermostat
-
Material: Metal pot with insulated handle
-
Applications: Wire tinning, PCB soldering, component dipping, DIY electronics
-
-

Product Configuration
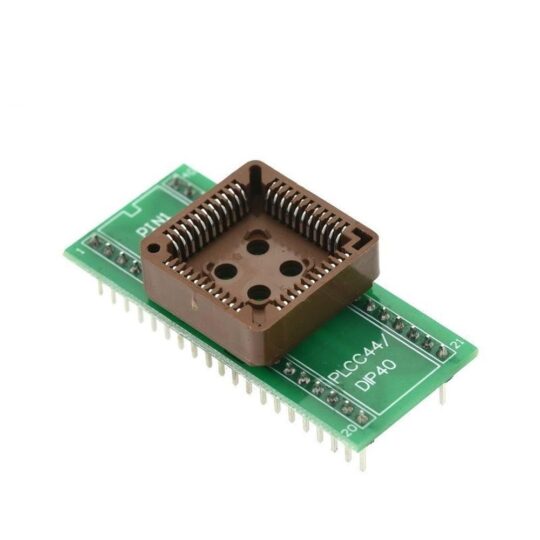
Insert Adapter: Plug the DIP40 male end firmly into the programmer’s ZIF socket (ensure pin 1 alignment).
-
Place Chip: Open the ZIF lever (if available) on the adapter, align the PLCC44 chip’s notch with the socket’s notch (pin 1 reference), and close the lever to secure.
-
Programmer Setup: In the programmer software, select the target chip model (e.g., SST29EE010).
-
Operations: Perform standard read/write/erase functions as with a DIP chip.
-
Safety: Power off the programmer when inserting/removing the adapter or chip.
Quick View
Wishlist
Compare
Add to cartProduct Configuration
Insert Adapter: Plug the DIP40 male end firmly into the programmer’s ZIF socket (ensure pin 1 alignment).
-
Place Chip: Open the ZIF lever (if available) on the adapter, align the PLCC44 chip’s notch with the socket’s notch (pin 1 reference), and close the lever to secure.
-
Programmer Setup: In the programmer software, select the target chip model (e.g., SST29EE010).
-
Operations: Perform standard read/write/erase functions as with a DIP chip.
-
Safety: Power off the programmer when inserting/removing the adapter or chip.
-
-

-
Brand/Model: Rangefinder Feeler Gauge
-
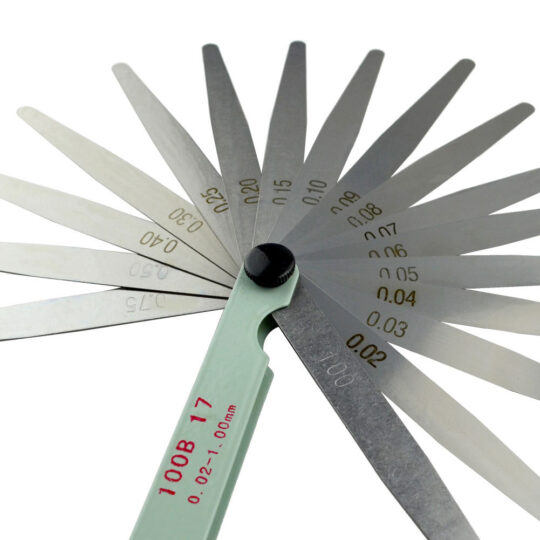
Measurement Range: 0.04mm – 0.88mm
-
Number of Blades: 32
-
Material: Stainless steel
-
Markings: Metric engraved sizes on each blade
-
Design: Foldable with thumb-screw lock
-
Usage: Valve clearance, spark plug gap, piston rings, nozzles, mechanical & DIY tasks
Quick View
Wishlist
Compare
Add to cart-
Brand/Model: Rangefinder Feeler Gauge
-
Measurement Range: 0.04mm – 0.88mm
-
Number of Blades: 32
-
Material: Stainless steel
-
Markings: Metric engraved sizes on each blade
-
Design: Foldable with thumb-screw lock
-
Usage: Valve clearance, spark plug gap, piston rings, nozzles, mechanical & DIY tasks
-
-

Software Setup:
-
-
Install the provided Windows software (e.g., “SP10-A Programmer”).
-
Connect the SP10-A to the PC via USB. The drivers should auto-install.
-
-
Hardware Connection for ISP:
-
Power Off the target device (e.g., motherboard).
-
Attach the SOIC8 clip to the BIOS chip, aligning the red wire (Pin 1) with the chip’s dot/mark.
-
Provide Standby Power: Connect a PSU’s 24-pin cable to the motherboard (do not turn it on).
-
-
Software Operations:
-
Open the software, click “Detect” to identify the chip.
-
Backup First: Click “Read” → Save the file as
original_bios.bin. -
Load new firmware: “Open File” → Select your
.binfile. -
Execute: Click “Erase” → “Program” → “Verify”.
-
-
Disconnect Safely:
-
Close software → Unplug USB → Disconnect PSU → Remove clip.
-
Quick View
Wishlist
Compare
Add to cartSoftware Setup:
-
-
Install the provided Windows software (e.g., “SP10-A Programmer”).
-
Connect the SP10-A to the PC via USB. The drivers should auto-install.
-
-
Hardware Connection for ISP:
-
Power Off the target device (e.g., motherboard).
-
Attach the SOIC8 clip to the BIOS chip, aligning the red wire (Pin 1) with the chip’s dot/mark.
-
Provide Standby Power: Connect a PSU’s 24-pin cable to the motherboard (do not turn it on).
-
-
Software Operations:
-
Open the software, click “Detect” to identify the chip.
-
Backup First: Click “Read” → Save the file as
original_bios.bin. -
Load new firmware: “Open File” → Select your
.binfile. -
Execute: Click “Erase” → “Program” → “Verify”.
-
-
Disconnect Safely:
-
Close software → Unplug USB → Disconnect PSU → Remove clip.
-
-
-

Product Type: SMD Soldering Paste Flux Grease
Quantity: 10cc (in syringe form)
Usage: SMD, SMT, IC, PCB, BGA, Mobile Repair
Material Form: Paste (Grease Type)
Lead-Free: Yes
Corrosive: No
Application Method: Manual (with syringe)
Storage Instructions: Store in cool, dry place away from sunlight
Suitable Users: DIY hobbyists, technicians, professional repair shops
Quick View
Wishlist
Compare
Add to cartProduct Type: SMD Soldering Paste Flux Grease
Quantity: 10cc (in syringe form)
Usage: SMD, SMT, IC, PCB, BGA, Mobile Repair
Material Form: Paste (Grease Type)
Lead-Free: Yes
Corrosive: No
Application Method: Manual (with syringe)
Storage Instructions: Store in cool, dry place away from sunlight
Suitable Users: DIY hobbyists, technicians, professional repair shops


