-

Product Configuration
This holder is a passive component but requires correct wiring for safe operation. Here is the standard configuration:
-
Battery Orientation:
-
Insert the three 18650 batteries according to the + and – symbols printed on the PCB. Incorrect insertion can cause a short circuit.
-
The batteries are connected in series. The positive (+) terminal of one cell is connected to the negative (-) terminal of the next.
-
-
Output Terminals:
-
The total voltage output is available at the two main terminals on the PCB:
-
Positive Output (+): This is the positive terminal of the last cell in the series chain.
-
Negative Output (-): This is the negative terminal of the first cell in the series chain.
-
-
The nominal output voltage will be approximately 11.1V (3.7V x 3) and can be up to 12.6V (4.2V x 3) when fully charged.
-
-
Connecting a BMS (Highly Recommended):
-
For safe operation, you must connect a 3S Lithium-Ion BMS (Battery Management System).
-
The BMS has two sets of connections:
-
B- (Battery Negative): Solder to the Negative Output (-) pad on the holder.
-
P- (Load Negative): This becomes the new negative output for your project.
-
B1 & B2 (Balance Wires): Solder these to the connection points between the cells. Your holder should have labeled pads for these (e.g., B1, B2, B3).
-
P+ (Positive Output): This is connected directly to the Positive Output (+) pad on the holder.
-
-
-
Final Project Connection:
-
Your project’s positive wire should connect to P+ on the BMS.
-
Your project’s negative wire should connect to P- on the BMS.
-
Quick View
Wishlist
Compare
Add to cartProduct Configuration
This holder is a passive component but requires correct wiring for safe operation. Here is the standard configuration:
-
Battery Orientation:
-
Insert the three 18650 batteries according to the + and – symbols printed on the PCB. Incorrect insertion can cause a short circuit.
-
The batteries are connected in series. The positive (+) terminal of one cell is connected to the negative (-) terminal of the next.
-
-
Output Terminals:
-
The total voltage output is available at the two main terminals on the PCB:
-
Positive Output (+): This is the positive terminal of the last cell in the series chain.
-
Negative Output (-): This is the negative terminal of the first cell in the series chain.
-
-
The nominal output voltage will be approximately 11.1V (3.7V x 3) and can be up to 12.6V (4.2V x 3) when fully charged.
-
-
Connecting a BMS (Highly Recommended):
-
For safe operation, you must connect a 3S Lithium-Ion BMS (Battery Management System).
-
The BMS has two sets of connections:
-
B- (Battery Negative): Solder to the Negative Output (-) pad on the holder.
-
P- (Load Negative): This becomes the new negative output for your project.
-
B1 & B2 (Balance Wires): Solder these to the connection points between the cells. Your holder should have labeled pads for these (e.g., B1, B2, B3).
-
P+ (Positive Output): This is connected directly to the Positive Output (+) pad on the holder.
-
-
-
Final Project Connection:
-
Your project’s positive wire should connect to P+ on the BMS.
-
Your project’s negative wire should connect to P- on the BMS.
-
-
-

-
Product Type: Dupont Jumper Wires
-
Length: 20cm
-
Connector Type: Male to Female
-
Number of Pins: 40
-
Material: Copper wire with PVC insulation
-
Color: Multi-color (for easy identification)
-
Compatibility: Arduino, Raspberry Pi, Breadboards, ESP32, NodeMCU, Microcontrollers, DIY electronics
20 day deliveryQuick View
Wishlist
Compare
Add to cartSold: 0Available: 10-
Product Type: Dupont Jumper Wires
-
Length: 20cm
-
Connector Type: Male to Female
-
Number of Pins: 40
-
Material: Copper wire with PVC insulation
-
Color: Multi-color (for easy identification)
-
Compatibility: Arduino, Raspberry Pi, Breadboards, ESP32, NodeMCU, Microcontrollers, DIY electronics
20 day delivery -
-

This is a non-configurable, fixed-power tool. Setup and usage are direct but require caution:
-
Safety First: Ensure you are in a region with 220V AC mains power. Using it on a different voltage (like 110V) will result in weak performance, while connecting a 220V device to a higher voltage is dangerous and will destroy it.
-
Power On: Plug the iron directly into a 220V wall outlet.
-
Heating: Allow the iron 3-5 minutes to reach its full operating temperature (typically around 400°C – 450°C).
-
Soldering: Use it for large-gauge wiring, terminals, and other high-heat tasks.
-
Safety Stand: Always use a dedicated soldering iron stand to hold the hot iron when not in active use. Never place it directly on a workbench.
-
Maintenance: Keep the tip clean and tinned with solder to prevent oxidation and ensure efficient heat transfer.
Important Warning: This iron does not have temperature control. It will continuously run at full power and can become extremely hot, posing a significant risk of burning components if used on modern electronics. It is not suitable for precision PCB work.
Quick View
Wishlist
Compare
Add to cartThis is a non-configurable, fixed-power tool. Setup and usage are direct but require caution:
-
Safety First: Ensure you are in a region with 220V AC mains power. Using it on a different voltage (like 110V) will result in weak performance, while connecting a 220V device to a higher voltage is dangerous and will destroy it.
-
Power On: Plug the iron directly into a 220V wall outlet.
-
Heating: Allow the iron 3-5 minutes to reach its full operating temperature (typically around 400°C – 450°C).
-
Soldering: Use it for large-gauge wiring, terminals, and other high-heat tasks.
-
Safety Stand: Always use a dedicated soldering iron stand to hold the hot iron when not in active use. Never place it directly on a workbench.
-
Maintenance: Keep the tip clean and tinned with solder to prevent oxidation and ensure efficient heat transfer.
Important Warning: This iron does not have temperature control. It will continuously run at full power and can become extremely hot, posing a significant risk of burning components if used on modern electronics. It is not suitable for precision PCB work.
-
-

-
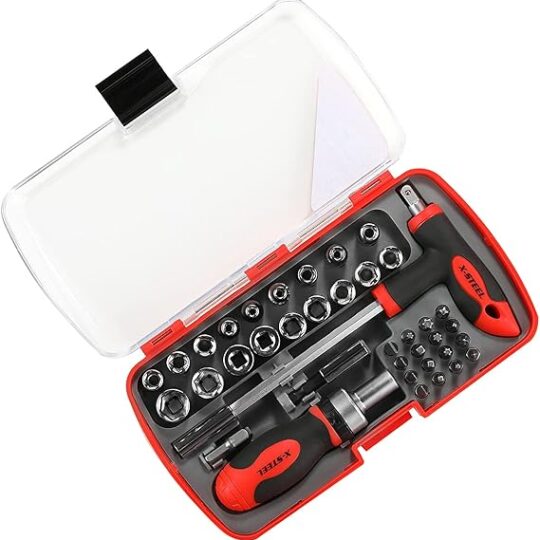
Type: 24pcs T-Shape Screwdriver Socket & Bit Tool Kit
-
Handle: Ergonomic T-handle screwdriver
-
Material: Chrome-vanadium steel
-
Set Includes:
-
1 × T-Handle Screwdriver
-
Multiple screwdriver bits (flat, Phillips, Torx, etc.)
-
Socket heads (various sizes)
-
Compact storage case
-
-
Applications: Home repair, office equipment, electronics, furniture, DIY projects
20 day deliveryQuick View
Wishlist
Compare
Add to cartSold: 0Available: 8-
Type: 24pcs T-Shape Screwdriver Socket & Bit Tool Kit
-
Handle: Ergonomic T-handle screwdriver
-
Material: Chrome-vanadium steel
-
Set Includes:
-
1 × T-Handle Screwdriver
-
Multiple screwdriver bits (flat, Phillips, Torx, etc.)
-
Socket heads (various sizes)
-
Compact storage case
-
-
Applications: Home repair, office equipment, electronics, furniture, DIY projects
20 day delivery -
-
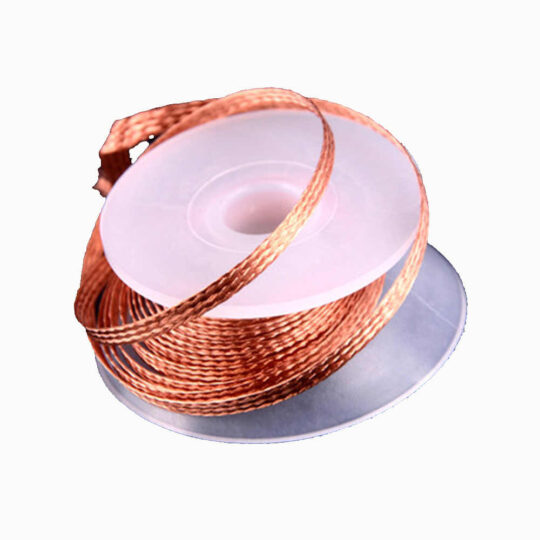
Product Type: Desoldering Copper Wick
Material: Pure Copper Braid
Length: 2ft (0.75m)
Width: 2.0mm
Treatment: Anti-oxidation coating
Application: Electronics repair, rework, DIY soldering
-

Product Configuration
These are passive tools and do not require electronic configuration. Their “configuration” lies in selecting the right tool for the job:
-
Straight Tip Tweezer:
-
Use Case: General-purpose grabbing, placing through-hole components, holding wires steady while soldering, and straightening bent leads.
-
How to Use: Provides a firm, direct grip directly in front of the user.
-
-
Bent Tip Tweezer (45 or 90 degrees):
-
Use Case: Accessing components in crowded areas on a PCB where fingers or straight tweezers cannot fit. Excellent for placing components without your hand blocking the view.
-
How to Use: The angled tip allows you to approach the workpiece from the side.
-
-
Fine-Point Tweezer:
-
Use Case: Handling the smallest components, such as 0201 or 0402 SMD chips, retrieving solder splashes, or detailed precision work.
-
How to Use: The ultra-fine tips require a gentle touch to pick up and place micro-components accurately.
-
Quick View
Wishlist
Compare
Add to cartProduct Configuration
These are passive tools and do not require electronic configuration. Their “configuration” lies in selecting the right tool for the job:
-
Straight Tip Tweezer:
-
Use Case: General-purpose grabbing, placing through-hole components, holding wires steady while soldering, and straightening bent leads.
-
How to Use: Provides a firm, direct grip directly in front of the user.
-
-
Bent Tip Tweezer (45 or 90 degrees):
-
Use Case: Accessing components in crowded areas on a PCB where fingers or straight tweezers cannot fit. Excellent for placing components without your hand blocking the view.
-
How to Use: The angled tip allows you to approach the workpiece from the side.
-
-
Fine-Point Tweezer:
-
Use Case: Handling the smallest components, such as 0201 or 0402 SMD chips, retrieving solder splashes, or detailed precision work.
-
How to Use: The ultra-fine tips require a gentle touch to pick up and place micro-components accurately.
-
-
-

-
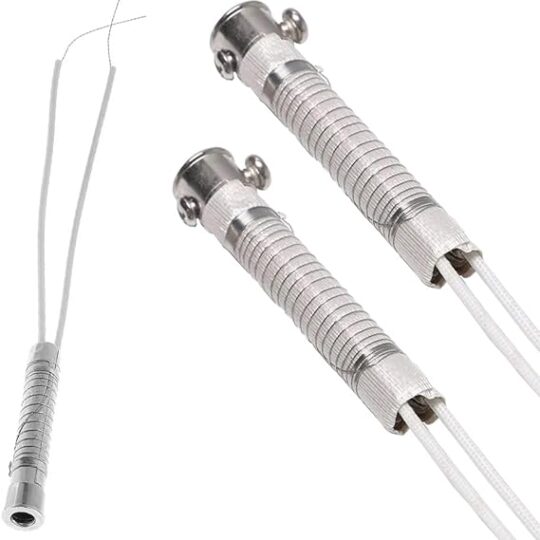
Product Name: 30W 220V Heating Element Iron Core
-
Power Rating: 30W
-
Input Voltage: 220V AC
-
Heating Material: Ceramic heating core
-
Compatibility: Fits most standard 30W soldering irons
-
Applications: Electronics repair, PCB assembly, DIY projects, electrical soldering
Quick View
Wishlist
Compare
Add to cart-
Product Name: 30W 220V Heating Element Iron Core
-
Power Rating: 30W
-
Input Voltage: 220V AC
-
Heating Material: Ceramic heating core
-
Compatibility: Fits most standard 30W soldering irons
-
Applications: Electronics repair, PCB assembly, DIY projects, electrical soldering
-
-

-
Product: Hot Air Nozzle Set
-
Quantity: 3 pieces per pack
-
Sizes: 7mm, 8mm, 10mm
-
Angle: 45-degree curved
-
Material: Stainless steel
-
Compatibility: 850 series & similar soldering stations
-
Use: SMD soldering, rework, chip/IC removal
-
Condition: 100% brand new and replaceable
-
Price Range in Pakistan: Around PKR 500 – 900 (varies by seller)
Quick View
Wishlist
Compare
Add to cart3pcs 45 Degree Hot Air Nozzles 7/8/10mm Curved Nozzles Replaceable For 850 Hot Air Soldering Station
$0-
Product: Hot Air Nozzle Set
-
Quantity: 3 pieces per pack
-
Sizes: 7mm, 8mm, 10mm
-
Angle: 45-degree curved
-
Material: Stainless steel
-
Compatibility: 850 series & similar soldering stations
-
Use: SMD soldering, rework, chip/IC removal
-
Condition: 100% brand new and replaceable
-
Price Range in Pakistan: Around PKR 500 – 900 (varies by seller)
-


