-
-
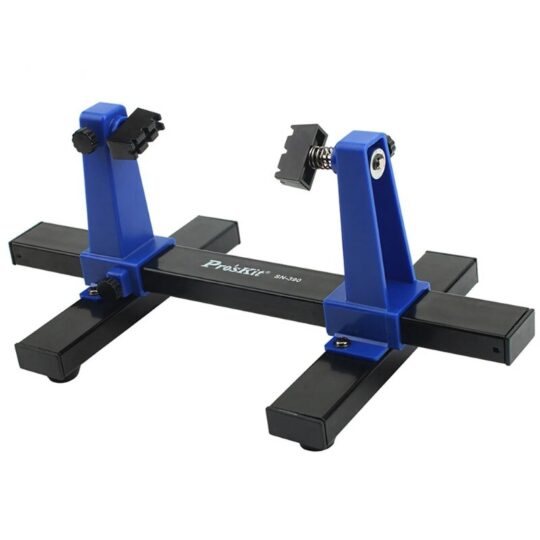
Model: SN-390 PCB Holder
-
Rotation: 360° adjustable swivel design
-
Material: Metal frame with anti-slip rubber base
-
Clamping Range: Supports multiple PCB sizes
-
Application: Soldering, assembly, rework, electronics repair
-
Weight: Lightweight yet sturdy build for stable use
-
Design: Foldable & portable for easy storage
Quick View
Wishlist
Compare
Add to cart-
Model: SN-390 PCB Holder
-
Rotation: 360° adjustable swivel design
-
Material: Metal frame with anti-slip rubber base
-
Clamping Range: Supports multiple PCB sizes
-
Application: Soldering, assembly, rework, electronics repair
-
Weight: Lightweight yet sturdy build for stable use
-
Design: Foldable & portable for easy storage
-
-
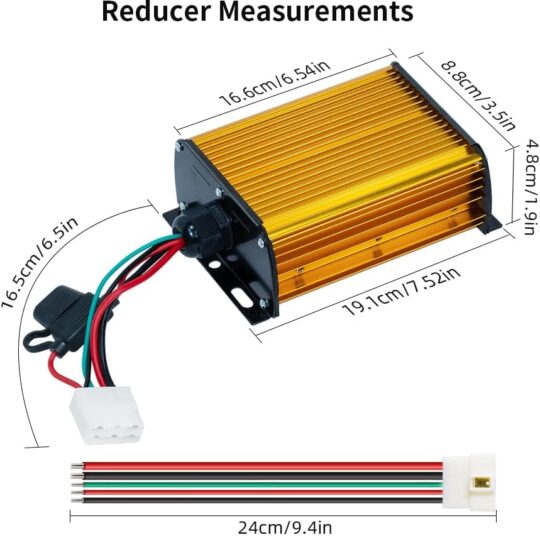
Product Configuration
Input (High Voltage Side – 48-72V):
-
Locate terminals labeled “VIN+” and “VIN-“.
-
Connect battery positive (+) to VIN+.
-
Connect battery negative (-) to VIN-.
-
Use thick wire (e.g., 12-10 AWG) for input.
Output (12V Side – Up to 30A):
-
Locate terminals labeled “VOUT+” and “VOUT-“.
-
Connect device positive (+) to VOUT+.
-
Connect device negative (-) to VOUT-“.
-
Use very thick wire (e.g., 10-8 AWG) for output.
Operation & Safety:
-
Automatic operation—powers on when input is connected.
-
Mount with airflow for cooling under high load.
-
⚠️ Never reverse input polarity (will destroy unit).
-
Add an inline fuse on input for overload protection.
Quick View
Wishlist
Compare
Add to cartProduct Configuration
Input (High Voltage Side – 48-72V):
-
Locate terminals labeled “VIN+” and “VIN-“.
-
Connect battery positive (+) to VIN+.
-
Connect battery negative (-) to VIN-.
-
Use thick wire (e.g., 12-10 AWG) for input.
Output (12V Side – Up to 30A):
-
Locate terminals labeled “VOUT+” and “VOUT-“.
-
Connect device positive (+) to VOUT+.
-
Connect device negative (-) to VOUT-“.
-
Use very thick wire (e.g., 10-8 AWG) for output.
Operation & Safety:
-
Automatic operation—powers on when input is connected.
-
Mount with airflow for cooling under high load.
-
⚠️ Never reverse input polarity (will destroy unit).
-
Add an inline fuse on input for overload protection.
-
-
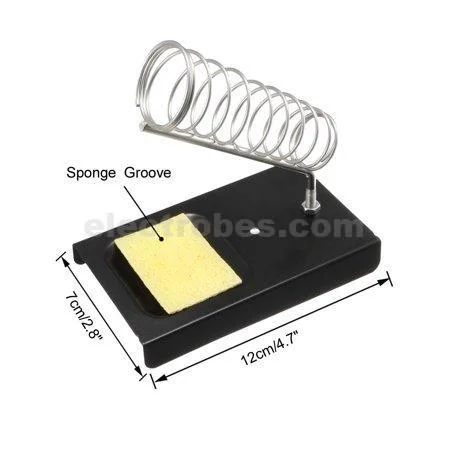
A soldering iron stand requires no complex configuration. Setup and use are straightforward:
-
Placement: Position the stand on a stable, flat, and heat-resistant surface within easy reach of your work area.
-
Sponge Preparation: Place the sponge in its metal tray and add a small amount of water to dampen it thoroughly. Wring it out so it is moist but not dripping.
-
Insert the Iron: Simply place the barrel of your soldering iron into the cradle or ring of the stand. Ensure it is seated securely and that the hot tip is not touching any part of the stand except the designated holder.
-
Cleaning: During use, quickly wipe the hot tip on the damp sponge to clean it.
Important Safety Note: Always assume the iron is hot. Never leave a soldering iron unattended while it is powered on, even when placed in its stand.
Quick View
Wishlist
Compare
Add to cartA soldering iron stand requires no complex configuration. Setup and use are straightforward:
-
Placement: Position the stand on a stable, flat, and heat-resistant surface within easy reach of your work area.
-
Sponge Preparation: Place the sponge in its metal tray and add a small amount of water to dampen it thoroughly. Wring it out so it is moist but not dripping.
-
Insert the Iron: Simply place the barrel of your soldering iron into the cradle or ring of the stand. Ensure it is seated securely and that the hot tip is not touching any part of the stand except the designated holder.
-
Cleaning: During use, quickly wipe the hot tip on the damp sponge to clean it.
Important Safety Note: Always assume the iron is hot. Never leave a soldering iron unattended while it is powered on, even when placed in its stand.
-
-
Sold: 0Available: 8
-
Model: LTJ217
-
Type: Soldering Iron Stand
-
Material: Metal spring with durable base
-
Compatibility: Fits most 40W–60W soldering irons
-
Design: Compact, lightweight, heat-resistant
-
Applications: PCB soldering, electronics repair, DIY projects
20 day delivery -
-
Soldering Iron Stand Single Spring For 40w 60w Soldering Iron Without Soldering Sponge
Rated 3.50 out of 5Sold: 6Available: 8-
Type: Single Spring Soldering Iron Stand
-
Compatibility: 40W–60W soldering irons
-
Material: Metal base + heat-resistant spring
-
Sponge: Not included
-
Application: Soldering, electronics repair, DIY projects
1 day delivery -
-
-
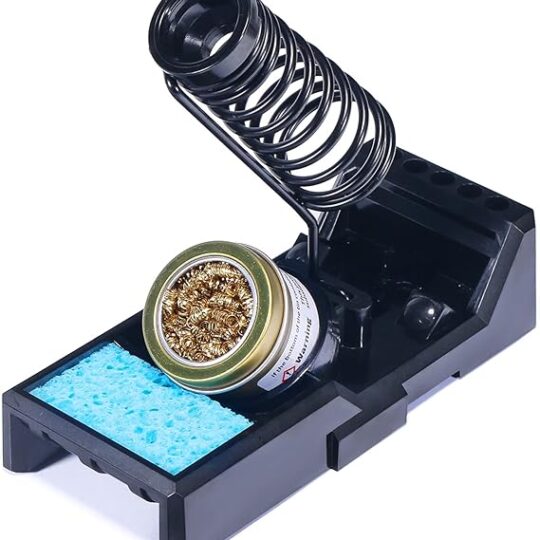
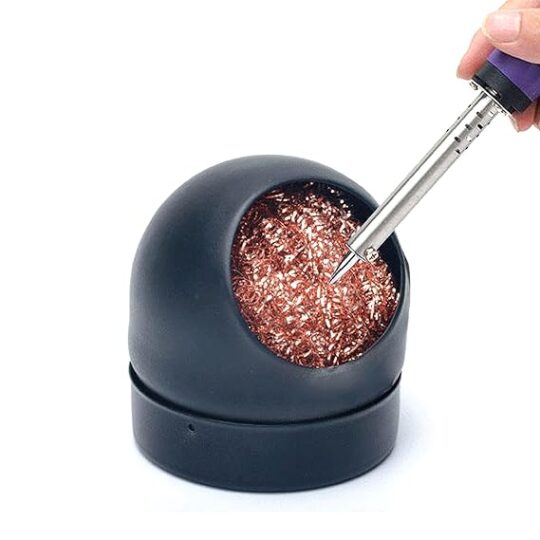
Product Type: Soldering iron tip cleaner with stand holder
-
Material: Steel wire sponge + durable holder
-
Function: Removes solder residue & oxidation without water
-
Design: Stable base stand with replaceable wire sponge
-
Compatibility: Suitable for BGA soldering stations & standard soldering irons
-
Features: Anti-rust, heat-resistant, long-lasting use
-
Applications: PCB soldering, electronics repair, BGA rework, DIY soldering projects
5 day deliveryQuick View
Wishlist
Compare
Sold: 0Available: 6-
Product Type: Soldering iron tip cleaner with stand holder
-
Material: Steel wire sponge + durable holder
-
Function: Removes solder residue & oxidation without water
-
Design: Stable base stand with replaceable wire sponge
-
Compatibility: Suitable for BGA soldering stations & standard soldering irons
-
Features: Anti-rust, heat-resistant, long-lasting use
-
Applications: PCB soldering, electronics repair, BGA rework, DIY soldering projects
5 day delivery -
-

-
Model: ST-Link V2
-
Supported MCUs: STM8, STM32
-
Interfaces: SWIM (for STM8), JTAG/SWD (for STM32)
-
Connection: USB 2.0 plug-and-play
-
Compatibility: STM32CubeIDE, Keil, IAR, STVD
-
Speed: High-speed debugging & programming
-
Build: Compact and portable design
-
Applications: Programming, debugging, firmware upload for STM microcontrollers
Quick View
Wishlist
Compare
Add to cart-
Model: ST-Link V2
-
Supported MCUs: STM8, STM32
-
Interfaces: SWIM (for STM8), JTAG/SWD (for STM32)
-
Connection: USB 2.0 plug-and-play
-
Compatibility: STM32CubeIDE, Keil, IAR, STVD
-
Speed: High-speed debugging & programming
-
Build: Compact and portable design
-
Applications: Programming, debugging, firmware upload for STM microcontrollers
-
-
Product Configuration
-
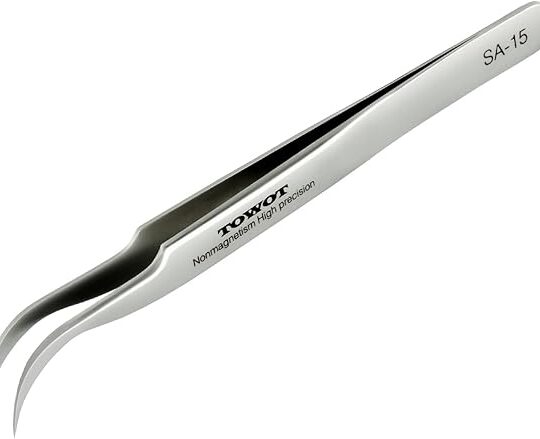
Selection: Choose tip angle (e.g., 45° for general use, 90° for deep recesses) and size based on task.
-
Grip: Hold like a pencil for fine control or use a firm grip for heavier components.
-
Application:
-
Use for placing/removing SMD components, bending leads, or retrieving parts.
-
Avoid excessive force to prevent tip damage or component slipping.
-
-
Cleaning: Clean tips regularly with isopropyl alcohol to maintain precision.
-
Storage: Keep in a protective case to avoid tip damage.
Quick View
Wishlist
Compare
Add to cartProduct Configuration
-
Selection: Choose tip angle (e.g., 45° for general use, 90° for deep recesses) and size based on task.
-
Grip: Hold like a pencil for fine control or use a firm grip for heavier components.
-
Application:
-
Use for placing/removing SMD components, bending leads, or retrieving parts.
-
Avoid excessive force to prevent tip damage or component slipping.
-
-
Cleaning: Clean tips regularly with isopropyl alcohol to maintain precision.
-
Storage: Keep in a protective case to avoid tip damage.
-


