-

Specification
-
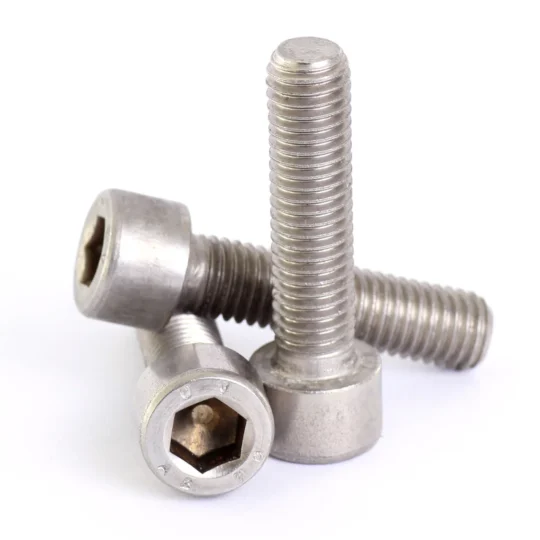
Screw Diameter: M4, M5, M6
-
Available Lengths: 8mm, 10mm, 12mm, 14mm, 16mm, 18mm, 20mm, 25mm, 30mm, 35mm, 40mm, 45mm, 50mm
-
Screw Size Options: 3mm, 4mm, 5mm, 6mm
-
Thread Size: M3 / M4 / M5 / M6
-
Colour: Silver
-
Material: High-strength Carbon Steel
Quick View
Wishlist
Add to cartSpecification
-
Screw Diameter: M4, M5, M6
-
Available Lengths: 8mm, 10mm, 12mm, 14mm, 16mm, 18mm, 20mm, 25mm, 30mm, 35mm, 40mm, 45mm, 50mm
-
Screw Size Options: 3mm, 4mm, 5mm, 6mm
-
Thread Size: M3 / M4 / M5 / M6
-
Colour: Silver
-
Material: High-strength Carbon Steel
-
-
Specification
-
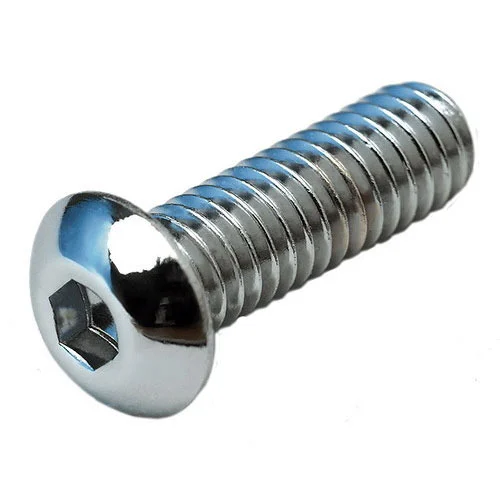
Screw Diameter: M4, M5, M6
-
Length Options: 8mm, 10mm, 12mm, 14mm, 16mm, 18mm, 20mm, 25mm, 30mm, 35mm, 40mm, 45mm
-
Screw Size: 3mm, 4mm, 5mm, 6mm
-
Material: Carbon Steel
-
Colour: Silver
-
Thread Type: M3 / M4 / M5 / M6
-
-

Software Setup:
-
-
Install the provided Windows software (e.g., “SP10-A Programmer”).
-
Connect the SP10-A to the PC via USB. The drivers should auto-install.
-
-
Hardware Connection for ISP:
-
Power Off the target device (e.g., motherboard).
-
Attach the SOIC8 clip to the BIOS chip, aligning the red wire (Pin 1) with the chip’s dot/mark.
-
Provide Standby Power: Connect a PSU’s 24-pin cable to the motherboard (do not turn it on).
-
-
Software Operations:
-
Open the software, click “Detect” to identify the chip.
-
Backup First: Click “Read” → Save the file as
original_bios.bin. -
Load new firmware: “Open File” → Select your
.binfile. -
Execute: Click “Erase” → “Program” → “Verify”.
-
-
Disconnect Safely:
-
Close software → Unplug USB → Disconnect PSU → Remove clip.
-
Quick View
Wishlist
Add to cartSoftware Setup:
-
-
Install the provided Windows software (e.g., “SP10-A Programmer”).
-
Connect the SP10-A to the PC via USB. The drivers should auto-install.
-
-
Hardware Connection for ISP:
-
Power Off the target device (e.g., motherboard).
-
Attach the SOIC8 clip to the BIOS chip, aligning the red wire (Pin 1) with the chip’s dot/mark.
-
Provide Standby Power: Connect a PSU’s 24-pin cable to the motherboard (do not turn it on).
-
-
Software Operations:
-
Open the software, click “Detect” to identify the chip.
-
Backup First: Click “Read” → Save the file as
original_bios.bin. -
Load new firmware: “Open File” → Select your
.binfile. -
Execute: Click “Erase” → “Program” → “Verify”.
-
-
Disconnect Safely:
-
Close software → Unplug USB → Disconnect PSU → Remove clip.
-
-
-

Specifications
Product Type: Brightening Day CreamSuitable For: All skin types
Texture: Lightweight, non-greasy, quick absorption
Key Functions: Brightening, moisturizing, nourishing
Daily Use: Yes
Quick View
Wishlist
Add to cartSpecifications
Product Type: Brightening Day CreamSuitable For: All skin types
Texture: Lightweight, non-greasy, quick absorption
Key Functions: Brightening, moisturizing, nourishing
Daily Use: Yes
-

Specifications
Product Type: Hair Removing Hot WaxStrip Requirement: No strips needed
Suitable For: Arms, legs, underarms, sensitive areas
Key Function: Removes hair from the root for long-lasting smoothness
Texture: Melted liquid that hardens on skin
Quick View
Wishlist
Add to cartSpecifications
Product Type: Hair Removing Hot WaxStrip Requirement: No strips needed
Suitable For: Arms, legs, underarms, sensitive areas
Key Function: Removes hair from the root for long-lasting smoothness
Texture: Melted liquid that hardens on skin
-

Specifications
Type: Hot WaxUsage: Hair removal (arms, legs, underarms, body)
Texture: Heat-to-apply formula
Skin Type: Normal to sensitive skin
Application Method: Spatula + wax strips
Quick View
Wishlist
Add to cartSpecifications
Type: Hot WaxUsage: Hair removal (arms, legs, underarms, body)
Texture: Heat-to-apply formula
Skin Type: Normal to sensitive skin
Application Method: Spatula + wax strips


